DVWA靶场学习(一)—— Brute Force
Brute Force
暴力破解其实就是利用不同的账户和密码进行多次尝试。
因为用户在设置密码时可能会选用比较容易记忆的口令,因此,可以使用一些保存常用密码的字典或者结合用户的个人信息进行爆破。
DVWA安全等级有Low,Medium,High和Impossible四种,随着安全等级的提高,网站的防护等级和攻击难度也不断提高。这里将DVWA安全等级设置为了Low。

Low
进入Brute Force页面,可以看到一个登录框,需要填写用户名和密码信息。

随意填写账号信息,使用BurpSuite进行抓包,可以看到Request请求中所填写的用户名和密码字段。

将抓到的数据包发送到Intruder模块(右键后选择Send to intruder),对用户名和密码字典进行爆破,选中需要爆破的字段然后点击Add。因此涉及两个字段这里选择Cluster bomb。

设置Payload,载入弱口令字典,这里使用了Github上面的一个开源项目中的字典,PasswordDic: https://github.com/wwl012345/PasswordDic

启动爆破,这里可以发现当用户名为admin,密码为password时返回的length不同,可以尝试进行登录,即可登陆成功。


Medium
整体流程与Low相同,不过服务器增加了2s的验证时间,破解速度略有减慢。

High
再次使用BurpSuite进行抓包,可以看到Get请求增加了user_token验证,并且每次登录该token值都会发生改变。

查看源码,可以看到增加了checkToken函数对user_token和session_token进行验证。

分析HTML源码,可以看到其中隐藏了user_token字段,也就是说,每次用户获取页面时,服务器会发送包含随机user_token值的页面,当用户提交表单时,就会将user_token值一同上传,服务器进行验证。也就是说,只要我们每次爆破时将对应的user_token字段一并提交即可。

重新抓包,设置需要爆破的字段,这里攻击模式改为Pitchfork。(四种攻击模式的区别可以自行查询了解。)

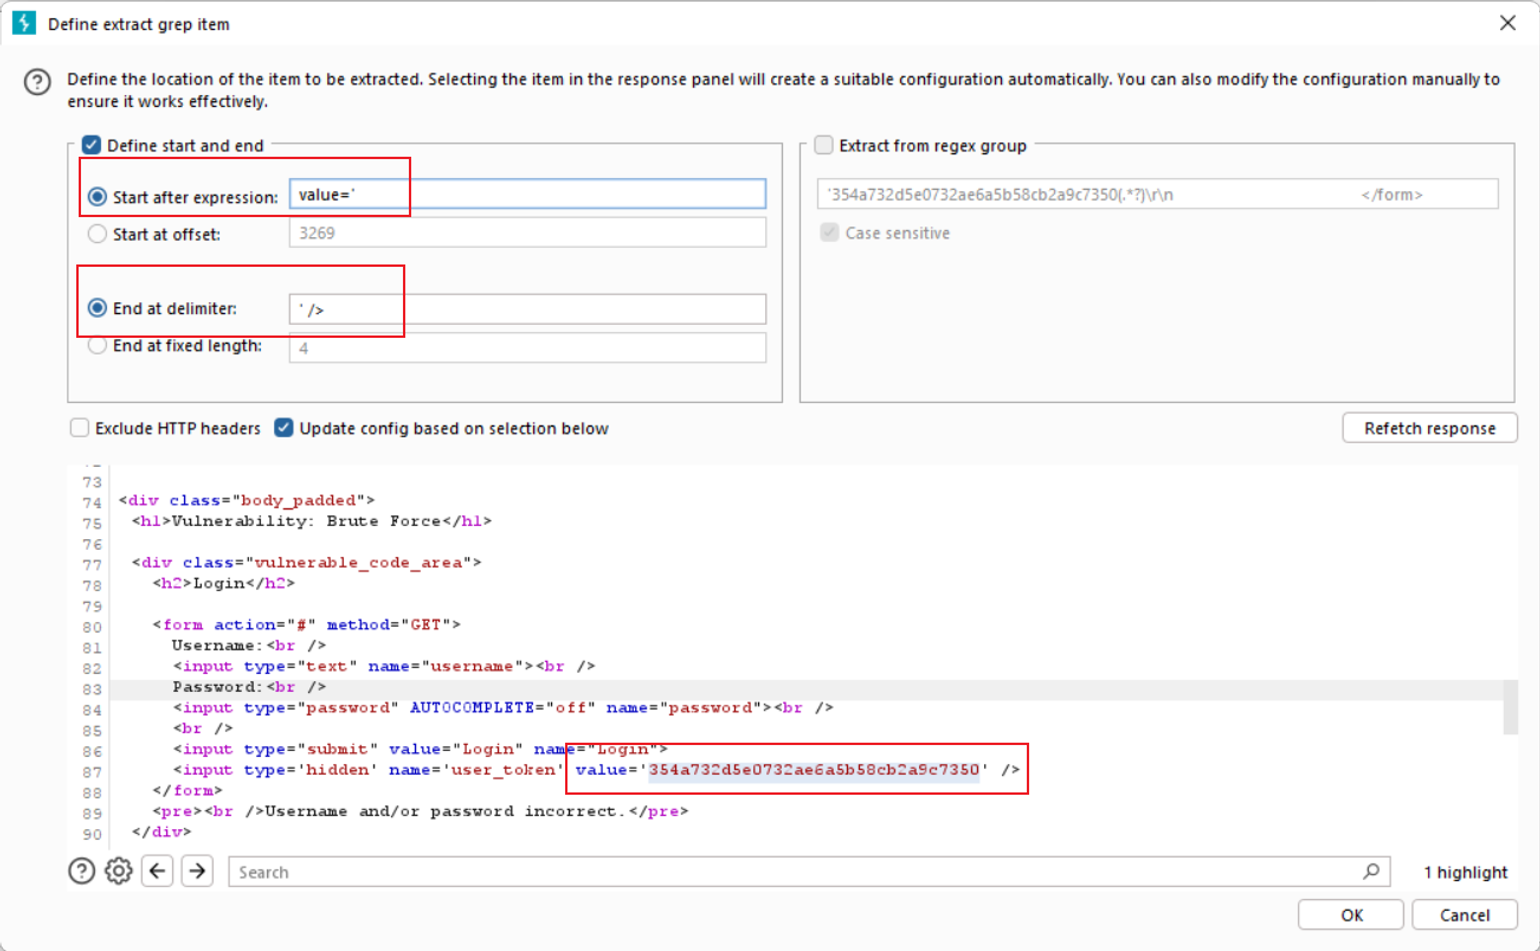
在Settings选择中找到Grep Extract即从响应中提取信息,选择Add。

设置要提取信息的起始位置。
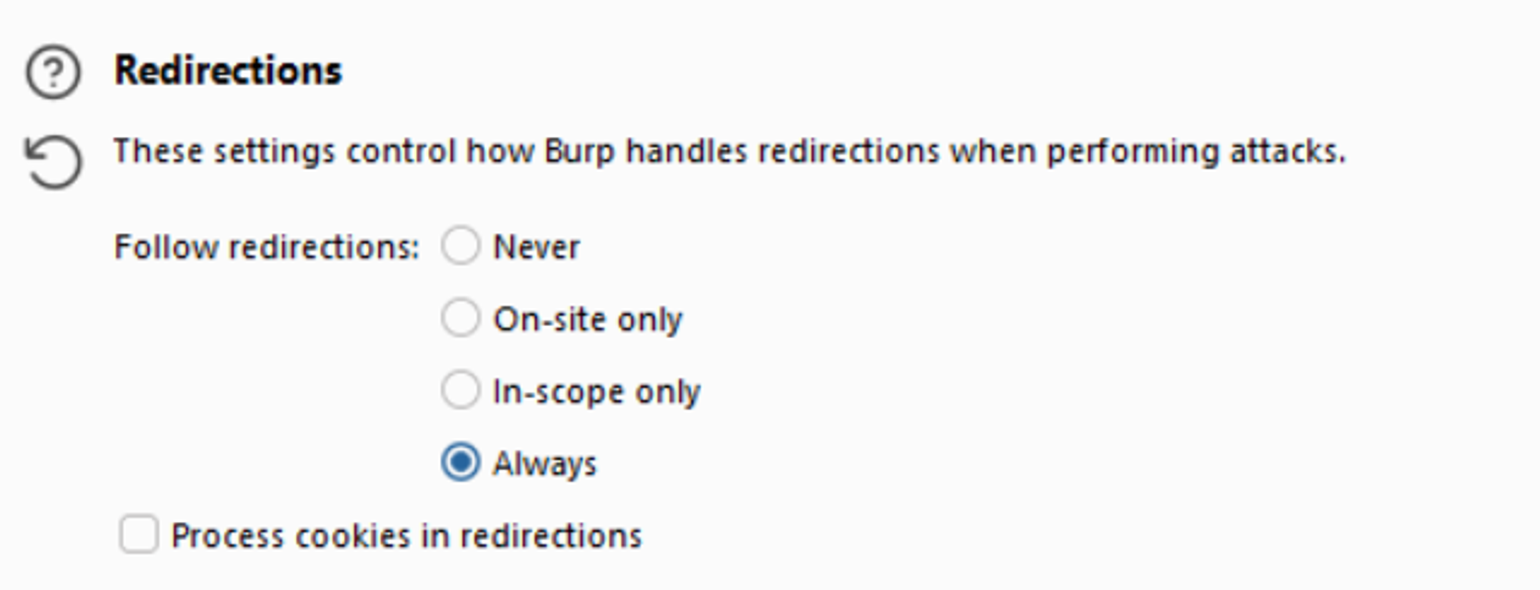
Redirection选择Always。
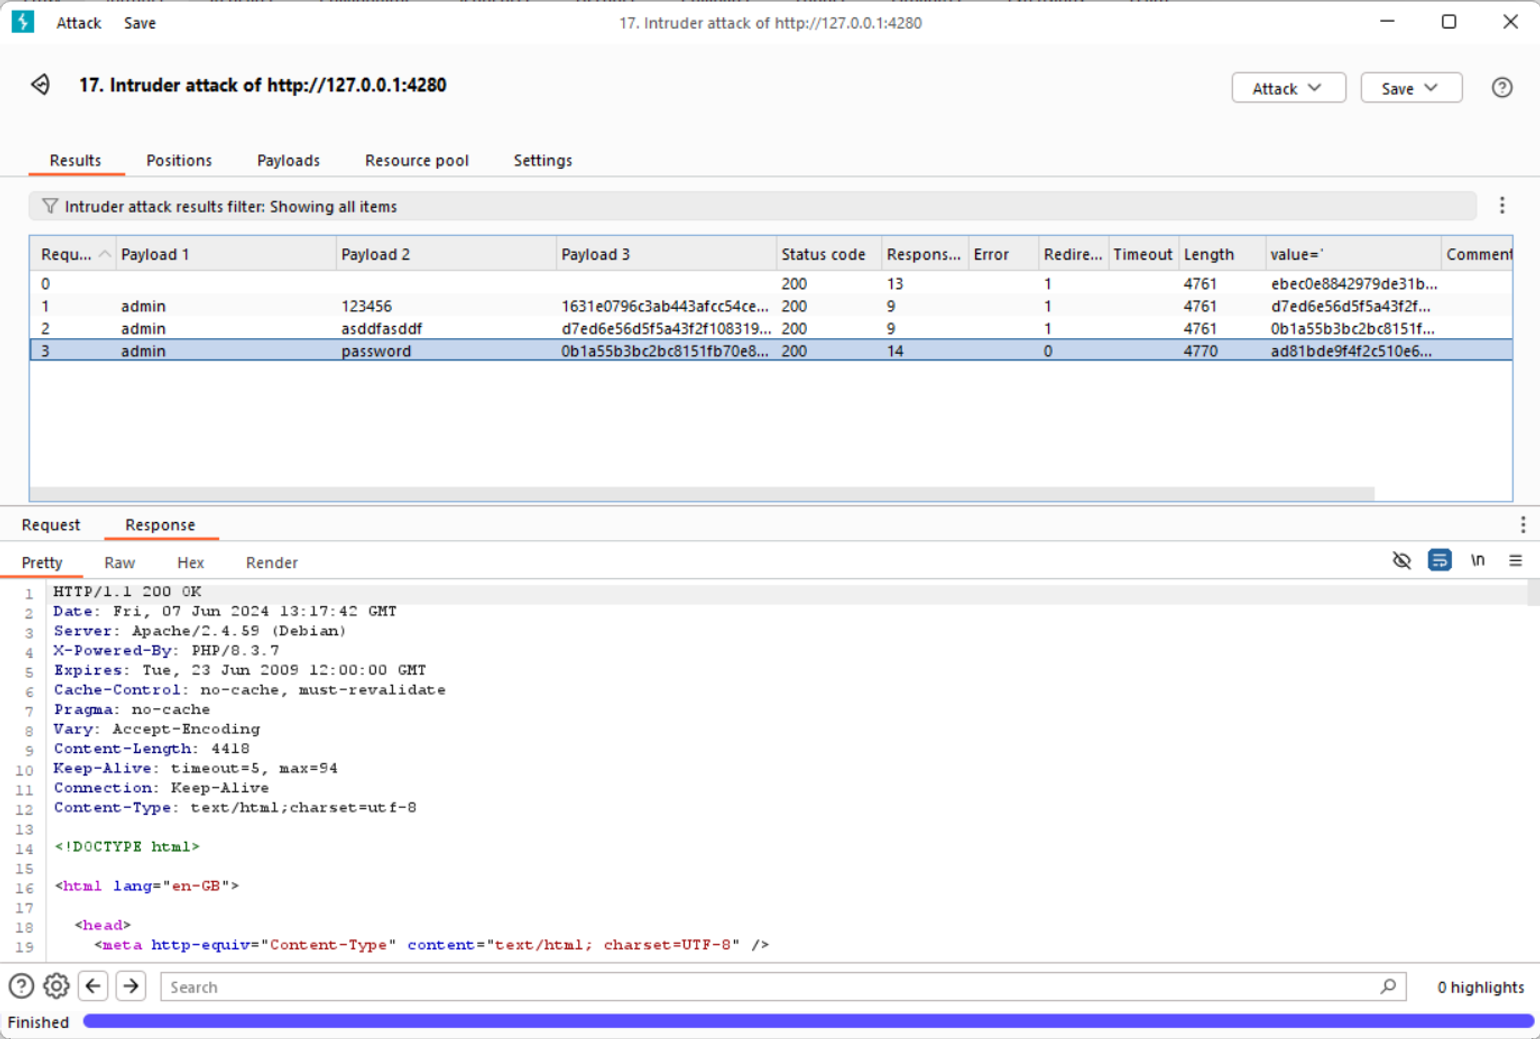
分别设置payload,第三个位置设置为Recursive grep

设置资源池,这里Conccurrent requests设置为1。

开始爆破即可得到用户名和密码。